ssh-keygen -b 2048 -t rsa -f /tmp/sshkey -q -N ""ssh -o StrictHostKeyChecking=no -i /tmp/sshkey jenkins@192.168.0.183 << EOF
ls -ltr
hostname
EOFssh-keygen -b 2048 -t rsa -f /tmp/sshkey -q -N ""ssh -o StrictHostKeyChecking=no -i /tmp/sshkey jenkins@192.168.0.183 << EOF
ls -ltr
hostname
EOFNote : If we creates eks cluster from UI it’s creates with different user and gives error when we do kubectl get pod
aws eks get-token --cluster-name eks1aws eks update-kubeconfig --name eks1aws sts get-caller-identityaws sts assume-role --role-arn "arn:aws:iam::1111111111:role/role-name" --role-session-name "tests3"aws --profile=default eks update-kubeconfig --name eks1aws eks create-cluster \
--region ap-south-1 \
--name eks1 \
--kubernetes-version 1.20 \
--role-arn arn:aws:iam::account_number:role/eks1-clst \
--resources-vpc-config subnetIds=subnet-093a2ddfcb7bc30b1,subnet-0475d9e26dfdc9d00,subnet-0274975b4af3513eeaws eks describe-cluster \
--region ap-south-1 \
--name eks1 \
--query "cluster.status"https://docs.aws.amazon.com/eks/latest/userguide/create-cluster.html
always check the minimum version of aws cli for eks
https://aws.amazon.com/premiumsupport/knowledge-center/eks-api-server-unauthorized-error/
pipeline {
    agent {label 'master'}
    parameters {
    string(name: 'string1', defaultValue: 's1', description: 's1')
    choice(name: 'CHOICES', choices: ['one', 'two', 'three'], description: 'chose')
    password(name: 'password', defaultValue: 'SECRET', description: 'password')
    }
    stages{
        stage('one'){
            steps{
                sh "echo abc > abc.txt"
                stash includes: 'abc.txt', name: 'abc'
                sh "rm -rf abc.txt"
            }
        }
        stage('two'){
            steps{
                unstash 'abc'
                sh "cat abc.txt"
            }
        }
    }
}pipeline {
agent {label 'master'}
stages{
stage('one'){
steps{
sh "echo abc > abc.txt"
stash includes: 'abc.txt', name: 'abc'
sh "rm -rf abc.txt"
}
}
stage('two'){
steps{
unstash 'abc'
sh "cat abc.txt"
}
}
}
}Open port using NC:
nc 8888Listen port:
nc localhost 8888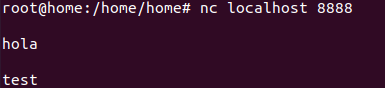
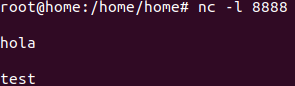
Send packet using bash:
echo -n "hello" >/dev/tcp/localhost/8888#Dockerfile
FROM ubuntu
RUN apt update -y
RUN apt install cifs-utils -y
docker build -t cifs .docker run -it --cap-add SYS_ADMIN --cap-add DAC_READ_SEARCH -cap-add NET_BIND_SERVICE cifs bash#centos with privileged (working)
docker run --privileged -it --cap-add SYS_ADMIN --cap-add DAC_READ_SEARCH --cap-add NET_BIND_SERVICE centos bashmount -t cifs -o username=a,password=a //192.168.0.228/public /mntmount -t cifs -o username=a,password=a //192.168.0.228/public /mntmount -t cifs -o username=a,password=a,ro,domain=WORKGROUP //192.168.0.228/public /a -vcat /sys/devices/virtual/dmi/id/board_asset_tag
#short hostname
hname=$(cat /sys/devices/virtual/dmi/id/board_asset_tag | awk '{print substr($0,5,15)}')
hostnamectl set-hostname $hname
CREATE USER 'root'@'%' IDENTIFIED BY 'Test#123';

GRANT ALL PRIVILEGES ON *.* TO 'root'@'%' WITH GRANT OPTION;yum install sysstat -y
iostat -t
iostat -xtc
iostat -d
#More command

iostat -dx /dev/sda 5
sar
vmstat
badblock