encrypt local directory and volume with gocryptfs and Cryptomator

  • auto mount with sirikali

Method 1: SiriKali auto-mount after login (recommended)

  1. Open SiriKali → Favorites → Manage Favorites.
  2. Add your existing gocryptfs volume to Favorites.
  3. Set a permanent mount-point path.
  4. Open Favorites → Manage Favorites → Manage Keys In Wallets.
  5. Select a wallet (GNOME Keyring, KDE Wallet, or SiriKali’s internal wallet) and save the volume password.
  6. In Menu → Settings → General Options, disable Show Mount Dialog When Auto Mounting.
  7. Configure SiriKali to start automatically when you log in, and enable its auto-mount option for your favorite volume, if available in your version.

Compress and encrypt a directory with tar and gpg command

  1. Compress and encrypt a directory
tar -czf - myfolder/ | gpg --symmetric --cipher-algo AES256 -o myfolder.tar.gz.gpg


tar -czf - — compresses the directory and sends the archive to stdout.
gpg --symmetric — encrypts using a password.
--cipher-algo AES256 — uses AES-256 encryption.
-o — specifies the output filename.

2. Decrypt and extract

gpg --decrypt myfolder.tar.gz.gpg | tar -xzf -


#GPG will request the password if it isn't already cached by gpg-agent.
@home:~$ tar -czf - bluetooth-status.sh | gpg --symmetric --cipher-algo AES256 -o  blue.tar.gz

@home:~$ gpg --decrypt blue.tar.gz | tar -tzf -
gpg: AES256.CFB encrypted data
gpg: encrypted with 1 passphrase
bluetooth-status.sh

@home:~$ gpg --decrypt blue.tar.gz 
gpg: AES256.CFB encrypted data
gpg: encrypted with 1 passphrase
��AK�0��)ު��P��v���	��7;��)�F��!�Ûѱ]"��������u:�\������	/��C�Y*��A2�L}�I�I�'牐�����?wK�>��;��O]�fe��ʢ��N׆'��y�V6$���zM��j�J
                                                                                                                                   )��Z~�����UD�a6"���b���\��d9��;E����$m6C���
                                                                                                                                                                               �V�R�C�~E�p*?�r�k_g��v����G�Ҵ\To��9{$�hܶ�go�����wtbto(
  • Or you can just encrypt the file using gpg command
gpg --symmetric --cipher-algo AES256 myfile.txt

gpg --output myfile.txt --decrypt myfile.txt.gpg

Crack zip lock password and passwd in linux

@home:~/Downloads$ zip-password-finder -i mahuli6.zip --minPasswordLen=6 --maxPasswordLen=6 --fileNumber=1 -c=d -w=12
Targeting file 'mahuli/mahuli-bg.jpg' within the archive
Archive encrypted with AES256 - expect a long wait time
Starting 12 workers to test passwords
Generating passwords with length from 6 to 6 for charset with length 10
0123456789
Starting search space for password length 6 (1000000 possibilities) 
Time elapsed: 2m 51s 256ms 948us 212ns
Password found:666666
unshadow /etc/passwd  /etc/shadow > pass.txt
user@home:~$ john pass.txt
user@home:~$ john pass.txt --show
abc1:11111111:1000:1000:abc1:/home/abc1:/bin/bash
abc2:22222222:1002:1002:,,,:/home/abc2:/bin/bash


user@home:~$ ls .john/
john.log  john.pot

Note: Don’t use simple password.

Remove weak Ciphers SSL – nginx

GCM is preferred over CBC

  • Verify with cipher is being used?
nmap --script ssl-enum-ciphers -p 443 example.com
  • update nginx.conf
ssl_ciphers         HIGH:!aNULL:!MD5!TLS_ECDHE_RSA_WITH_AES_128_CBC_SHA256;

https://superuser.com/questions/109213/how-do-i-list-the-ssl-tls-cipher-suites-a-particular-website-offers

https://stackoverflow.com/questions/62900667/aws-alb-prevent-usage-of-tls-ecdhe-rsa-with-aes-128-cbc-sha256

AD integration with linux ssh login and sudo access

ad_join.sh

#!/bin/bash

#check if already joined to domain

if [[ $(realm list) != "" ]]
then
echo "This server is already joined to domain."
realm list | head -n 1
exit
fi

function update_sssd_config() {
    sed -i 's/use_fully_qualified_names = True/use_fully_qualified_names = False/g' /etc/sssd/sssd.conf
    sed -i 's|/home/%u@%d|/home/%u|g' /etc/sssd/sssd.conf
    systemctl restart sssd
}

function restrict_ssh_access_group() {
    if [[ $(cat /etc/ssh/sshd_config | grep -o "updated_by_ad_join") != "updated_by_ad_join" ]]
    then
    echo "###############updated_by_ad_join.sh###############" >> /etc/ssh/sshd_config
    echo "AllowGroups root ssh-access-group" >> /etc/ssh/sshd_config
    systemctl restart sshd
    fi
}

function sudo_access_level_group() {
    if [[ $(cat /etc/sudoers | grep -o "updated_by_ad_join") != "updated_by_ad_join" ]]
    then
    echo "###############updated_by_ad_join.sh###############" >> /etc/sudoers
    echo "Cmnd_Alias SUDO_ACCESS_LEVEL1 = /usr/bin/ls, /usr/bin/cat " >> /etc/sudoers
    echo "Cmnd_Alias SUDO_ACCESS_LEVEL2 = /usr/bin/vi, /usr/bin/nano " >> /etc/sudoers

    echo "%sudo-group-level1 ALL=(ALL) NOPASSWD: SUDO_ACCESS_LEVEL1"  >> /etc/sudoers
    echo "%sudo-group-level2 ALL=(ALL) NOPASSWD: SUDO_ACCESS_LEVEL2"  >> /etc/sudoers
    echo "%sudo-group-full-access ALL=(ALL) NOPASSWD: ALL"  >> /etc/sudoers
    fi
}

#check os 
if [[ $(cat /etc/os-release | egrep "centos|redhat|fedora|rhel|oracle|rocky") != "" ]]
then
yum install sssd realmd oddjob oddjob-mkhomedir adcli samba-common samba-common-tools krb5-workstation openldap-clients  -y
realm join -vvv --user=administrator ad.example.com

#call function
update_sssd_config

restrict_ssh_access_group

sudo_access_level_group

fi

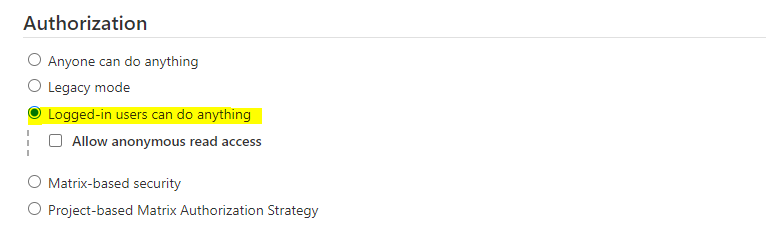
Jenkins AD integration and access management

  • First take the back up of /var/jenkins_home/config.xml or take a snapshot if it’s vm.

Method 1: (all user have same admin access)

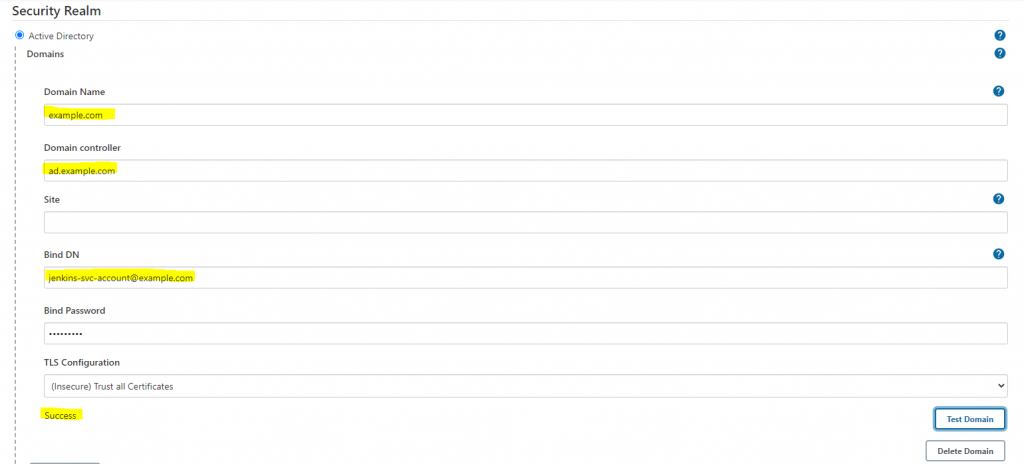
  • Manage jenkins > Configure Global Security > Active Directory
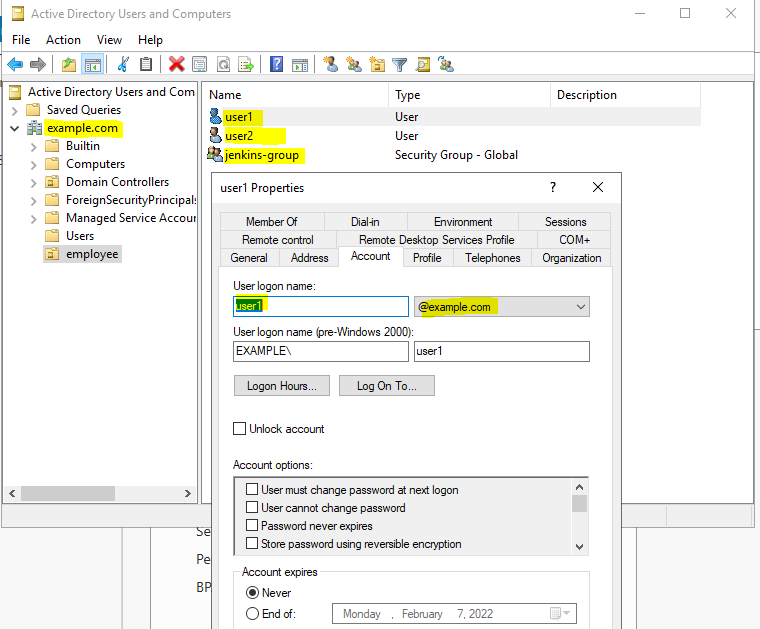
Domain name : example.com
Domain Controller : ad.exmaple.com
Bind DN : jenkins-svc-account@example.com
Bind Password : <jenkins-svc-account password>

Note: You may need to apply the setting and then click on Test Domain.

Else it will give Error: simple bind failed: ad.example.com:389 error

Also Domain Name(example.com) should be resolved from jenkins host or entry should be in /etc/hosts

192.168.122.6 example.com

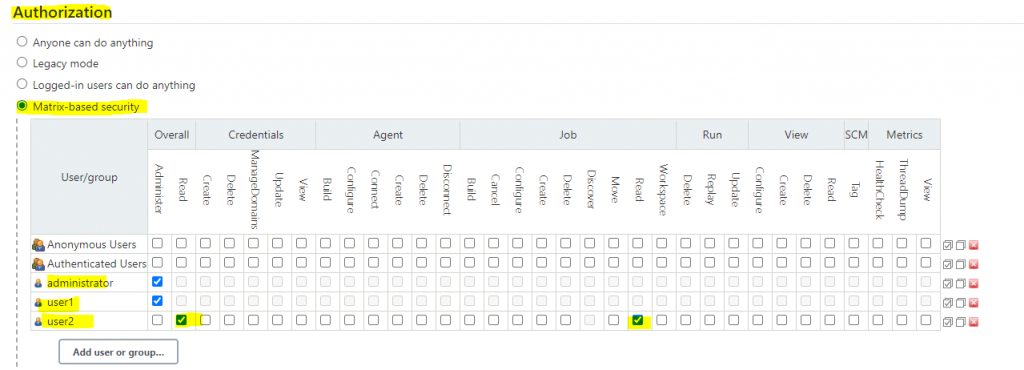
Method 2: Matrix-based security

Method3: Role based strategy(pending)

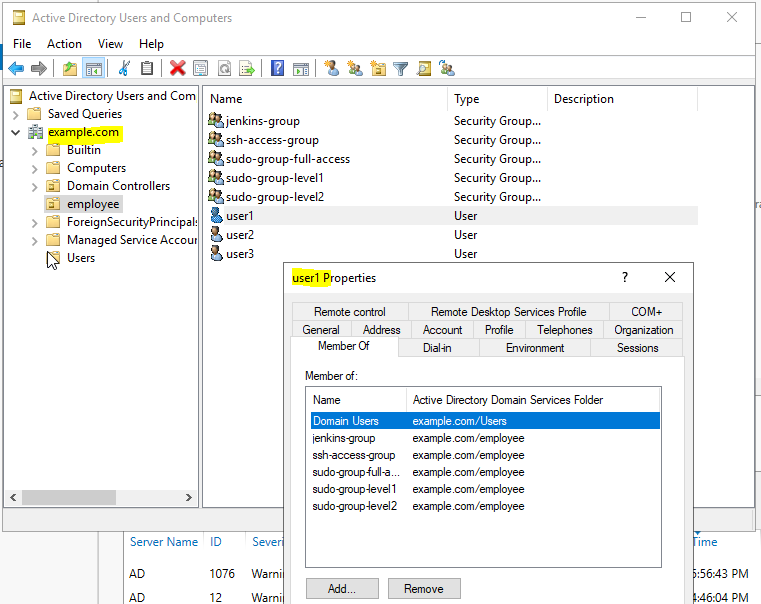
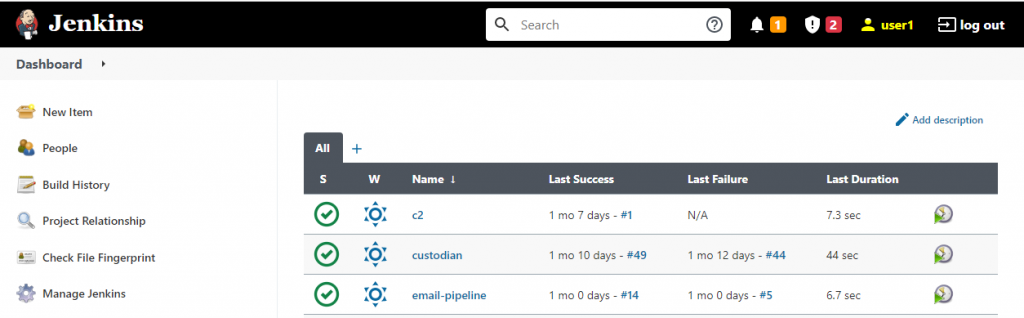
AD user and jenkins screenshot for reference

  • Check ldap port in powershell
tnc example.com -port 389

Test-NetConnection -ComputerName example.com -Port 389

Build haskell static binary with docker

Why?
– Reduce surface attack
– Reduce docker image size

hola.sh

{-# LANGUAGE OverloadedStrings #-}
import Web.Scotty

import Data.Monoid (mconcat)

main = scotty 3000 $
    get "/:word" $ do
        beam <- param "word"
        html $ mconcat ["<h1>Scotty, ", beam, " me up!</h1>"]

alpine.Dockerfile

FROM haskell:8 AS build
WORKDIR /opt
RUN cabal update
RUN cabal install --lib scotty
COPY hola.hs .
#RUN ghc --make -threaded hola.hs  -o hola
RUN ghc --make -threaded -optl-static -optl-pthread hola.hs -o hola

FROM alpine:3.15.0
RUN addgroup -S group1 && adduser -S user1 -G group1
USER user1
WORKDIR /opt
COPY --from=build /opt/hola .
EXPOSE 3000
CMD ["/opt/hola"]

More on haskell static binary –

capture TLS/HTTPS traffic via tcpdump

only TLS traffic

tcpdump -ni eth0 "(tcp[((tcp[12] & 0xf0) >> 2)] = 0x16)"

TLS traffic with port

tcpdump -ni eth0 "tcp port 443 and (tcp[((tcp[12] & 0xf0) >> 2)] = 0x16)"

TLS traffic with host ip

tcpdump -ni eth0 "tcp host 10.10.10.10 and (tcp[((tcp[12] & 0xf0) >> 2)] = 0x16)"

Capture packets for wireshark

tcpdump -vvvv -A -i weave '((dst port 80) and (net 10.36.0.15))' -w app2.cap


sudo tcpdump -vvvv -A -i etho -w app2.cap

More : https://stackoverflow.com/questions/39624745/capture-only-ssl-handshake-with-tcpdump

https://www.wireshark.org/docs/wsug_html_chunked/AppToolstcpdump.html

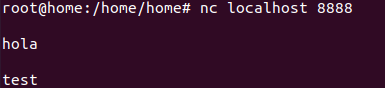
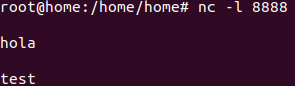
Openport using NC:

nc -l 8888

Listen port:

nc -l localhost 8888

Send packet using bash:

echo -n "hello" >/dev/tcp/localhost/8888